Sunday, February 7, 2016

Green Corn Tamales

Every once in a while I have a strong NEED to taste the food of my teenage years. Having spent my teen years in southern Arizona, Green Corn Tamales were the food of the fall and holiday season.  I seem to remember them with fresh corn, strait off the cob, but I now live in Texas and it is February and a girl does what a girl has to do.  So I have spent weeks perusing various tamale recipes.  And finally decided I was ready to tackle this big project.


Our cast of characters:  Corn Husks.  Masa.  Monterey Jack Cheese.  Corn.  Green Chilies.  Chicken.  Unsalted Butter.
the pieces ready for assembly.  Shredded cheese, masa mix, shredded chicken.
I know it looks gross, but trust me it's important
Lunch is Served!


Green Corn Tamales

20 dry corn husks, soaked in hot water to make pliable

3 chicken breasts
4 medium heat green chiles

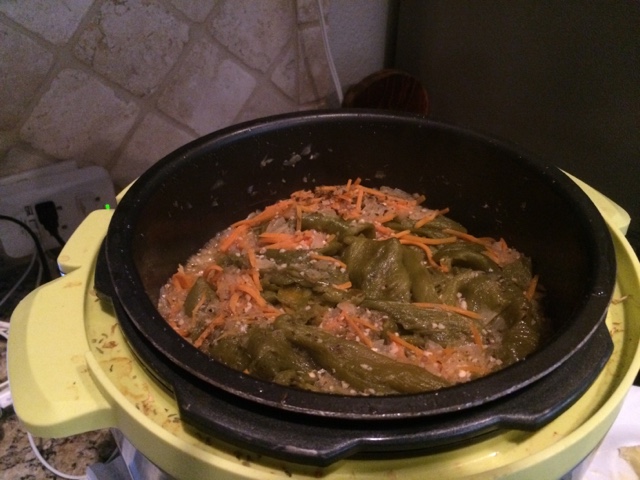
Layer in pressure cooker, add 1 c water, pressure high 15 minutes.  Natural release.  When cool use Bosch with paddles to shred. (Chicken and chilies, not liquid)

2 c shredded Monterey Jack cheese

1 c unsalted butter
1 tsp salt
1tsp baking soda
1/2 tsp cumin
1 tbs sugar
In clean mixer, using paddles whip until fluffy.

Meanwhile in another bowl mix 2 c masa harina (This is the dry stuff, found in the mexican food isle of the grocery...not the dough like I have in the picture...I had to go back to the market)  and 1 can of drained corn (processed in food processor so it's cut smaller, but not paste).  Add 1 1/2 c chicken broth, 1/2 c at a time.  Mix should be pea size, like making piecrust.

Now mix masa mixture into fluffy butter, adding a cup at a time, continue mixing with paddles 10 minutes.  Drop a small peice into a cup of water.  If it floats, you are ready.

Use glad press n seal on counter top to keep mess to a minimum.

Taking a corn husk lay flat and add a scoop of masa.   Spread with rubber spatula keeping about1/3 inch thick.  Put a line of cheese topped with chicken in center.  Pull sides of husk together, then gently open up.  Using the husk, make sure tamale is sealed.  Open husk again, now roll like a burrito, pull top down, roll the sides in.  I left one end open.  

Once all tamales are assembled, stack on steamer close together with open end up.  Add 1 c water, pressure on High for 20 minutes, natural release for 10 minutes.

I served mine with a swizzle of Ranch dressing on top.

Unconsumed tamales may be wrapped in ziplock bags and frozen.

Monday, January 4, 2016

Seriously Yummy Monday Night Pasta

Pasta in the pressure cooker doesn't have to be a hard thing.  Once you know the secret, it's super easy. So here's the secret.  Use a pasta shape that won't stick to itself (like spaghetti or fettuccini)  The more awkward the shape, the better it will work in the pc. And use just enough liquid to barely cover the pasta.  Now turn your pc on high, for HALF the time it tells you to boil it for.  Quick release.  Voila! it's done.

cast of characters


This is a little difficult to see, because I was cooking in the near dark, and using my cell phone.  There's no explaining why I do what I do. Just accept it and move on... But look at the cute message board my daughter-in-law made for me for christmas...

1 lb lean hamburger (please defrost so your won't look brown like it just came out of the microwave)
chopped onion (true there is no picture, but I am assuming you know what chopped onion looks like)
1/2 package pasta
1 jar sundried tomato pesto
fresh mozzarella pearls


brown meat and onions

Brown hamburger and onions... until almost completely brown...since we are going to pressure cook, I left it just a little pink.
place raw pasta on top of meat, cover (just barely) with water or broth

Once your meat is brown, pour the pasta and liquid on top.


pressure on high 6 minutes

Lock the lid in place and pressure on high for 6 minutes (the package directions said to boil 12-14 minutes)


finished product
Once the time is up, do a quick release of the pressure, remove lid.  At this point it was soupier than I wanted, so I drained off my liquid.  Added the jar of pesto and about 1/4 c mozzarella pearls.  Because I love melted cheese, but the man I cook for is not a big fan, so this is a great compromise, I get my melty cheese and he can easily take his and put it on my dish.  Yeah we are a study if perfect symbiocity. *I am almost certain I just made that word up.


Saturday, December 12, 2015

Mashed Potatoes

There's no picture because well (burp...)

I had an event tonight that I was asked to bring 20 lbs of mashed potatoes.

Did I mention 20 lbs in 12 minutes???  And it was only 12 minutes because my pc wasn't large enough for all the potatoes at once.

I bought 2 bags of red potatoes. Washed them.  Cut out the eyes.  Then cut in 1/4 and 1/3 depending on the size of the potato.  I was looking for about 2 inch chunks.  In 1 cup of chicken broth, I cooked for 6 minutes on high pressure. Quick release.  Dumped into an extra large bowl.  Filled the pc up again and did the other half.  While the 2nd half was cooking, I added 1/2 cube butter, 1/2 block cream cheese, and 1 cup heavy cream.  Then I used my potato masher and mashed the heck out of those poor spuds.  Seasoned with garlic pepper, salt and celery salt.  I then transferred to a crockpot.  I repeated with the other pot of potatoes, used the other half of the butter, cream and cream cheese and voila! 20 lbs of mashed potatoes in 12 minutes.

I LOVE MY PC!!

Wednesday, October 28, 2015

Yumioli ravioli soup

It's finally cooling down in Texas...well I'm still wearing capris and sandals, but it's cool enough to eat soup.

We were invited to eat dinner with another family from church a few weeks ago, and this is my attempt to recreate the amazing food she served us.

Yumoli Ravioli Soup

1/2 lb sausage (sweet Italian or hot..we used hot because it's us)
1 c chopped onion and celery
2 cups julienned carrots
1 can seasoned tomatoes
4 cups beef broth
1 pkg frozen ravioli
4 cups chicken broth

Brown sausage and onion and celery.  Add carrots, tomatoes, ravioli and beef broth.  Pressure on high 4 minutes.  Natural release.  Add chicken broth after cooking.  This just made more soup because I plan on having soup for lunch most of this week.


Someone doesn't have an appreciation of cheese...but I do!

Wednesday, September 16, 2015

Adventures in Green Chile

Otherwise know as Melanie uses every small appliance she has ever owned!

Growing up in the southwest, I know September means Hatch Green Chiles.  Oh the amazing wonders this little green thing can create.  So when I noticed I could get an entire case of Hatch chiles for only $20 through Bountiful Baskets, I was all over that!  I now have enough processed chile to last me a good long time.

The beauties arrive into my posession!

One entire day was devoted to roasting.  Basically I used the Pioneer Woman's directions on how to do this How to Roast Green Chiles  She is amazing and makes this very clear.
I got this amazing recipe from my lovely niece Shanon. it looks like it came from Food.com... I multiplied it by 10, and added 6 cups of shredded carrots.  But instead of following the directions I kind of went in a pressure cooker direction because that's what I do.

This lovely smelling pot full of yum was half of my X10 ingredients, pressured on HIGH for 6 minutes, quick release.

And then it went into the blender to become  smooth and uniform.

Did I mention I used every small appliance I own?  including the roaster because it was big enough to hold all of my sauce.
I ended up with 24 half pint jars, and 5 quart size bags frozen flat in my freezer.  And that was only half the case of chiles. The other 7 gallon size bags of roasted chile was packaged 4 chiles per bag, frozen flat.

So now I have a freezer full of yumminess, and 2 dozen jars of amazing green sauce to do with as I please... but there were still 2 bags needing to be peeled (yes I am drawing this project out... lucky for me I have an extra fridge outside to use for all my food projects.

 So today I was thinking about chile rellenos.  Don't you think about rellenos often?  I saved this recipe to my pinterest board a few years ago, and decided Today was the Day!  I will use the last of the chiles and make some Rellenos! This is the recipe I used for inspiration.

Chile Rellenos Casserole
Recipe Adapted by Winner Dinners/Origin Unknown
Serves 6

3 7-oz. cans whole green chiles
1 pound cheddar cheese, grated
1 pound jack cheese, grated
4 eggs
1 13-oz. can evaporated milk
3 tablespoons flour
1 teaspoon salt
1 6-oz. can tomato paste
Wash the chiles, removing the seeds, and dry on paper towels. Grate the cheeses. Reserve 1/2 cup of each of the two cheeses, mixing them together in a small bowl. This will go on top of the casserole later, so you can place it in the refrigerator for now. In a medium-sized casserole dish, approximately 8 x 11 (9 x 13 is too big), layer 1/2 of the chiles, all of the cheddar cheese, the remaining chiles, then all of the jack cheese. Separate the eggs. Beat the yolks and add the evaporated milk, flour and salt, beating until frothy. Beat the whites separately for about a minute. Combine the two egg mixtures and beat for a few seconds longer so that they are well-mixed. Pour the egg mixture over the chiles and cheese. Bake at 300 for 1 hour. Then spread the tomato paste over the top. Sprinkle with the reserved cheese you placed in the refrigerator. Bake 1/2 hour longer. Let stand for 5 minutes before serving.


 But it makes a full size casserole, and the man I live with is not a big chile fan...he will placate me by eating what I put on the dinner table in front of him, but he's not willingly going to choose this on his own.  Thus my dilemma:  I want this, but I don't need a whole casserole by myself.  So the solution was obviously make it in muffin tins!  And add bacon, because well BACON.


** I ACTUALLY ENDED UP USING12 EGGS, 4 FOR EACH MUFFIN TIN. I just mixed the eggs, flour and milk and salt in the blender and poured it over each.

you have to look closely to see the bacon bits.  Trust me they are there...
After 20 minutes this is what I have... 3 dozen mini relleno muffins, all that yummy goodness just waiting for breakfast, or lunch  or mid morning snack or mid afternoon snack...I somehow think these will not last as long as I had planned... Oh well, such is the plight of AMAZING mii relleanos with bacon!

This is where I was supposed to post the picture of those cute little rellenos topped with sour cream, but somehow they just disappeared... I will go put some more on a plate, just for blog post purposes...

please pretend my plate does not look like I just licked it off before adding more...

Friday, August 28, 2015

Clean it out Vegetable Soup


You have to trust me that my kitchen smells AMAZING.  Every few days I decide my diet is going to be healthier, I will add more vegetables and good stuff to my eating.  And then dinner happens or date night or Krispy Kreme lights up the "HOT" sign.  I am a work in progress.  But that being said, I now have lunch prepared for today and the next 5 days or so.  

Clean it out Vegetable Soup

1 frozen chicken breast
2 c shredded carrots
1/2 head cabbage
4 red potatoes
2 bell peppers
2 jalapeno peppers
2 onions
2 tsp minced garlic
2 tsp green curry sauce
3 c beef broth

Chop chicken with cleaver (it was really frozen!)  Add carrots.  Core cabbage, chop coarsely. Cut your potatoes into quarters. Seed and chop bells and jalapeños. The jalapeños add just the perfect kick to this soup.  Chop onion into chunks.  Add garlic and curry on top of this massive pile of chopped vegetables.  Pour broth over the top.  PC high 12 minutes.

Mine is creamy style because as I was cleaning out the vegetable drawer I noticed some cream cheese in there... so I added it after the cooking and stirred it into the hot soup for the creamy wonderfulness that it adds.

(btw this is the 2nd week in a row to make a variation of this soup, which is why I had 1/2 a head of cabbage just waiting to be used.)

is 10:30 to early for lunch??

Thursday, July 2, 2015

Yippee-ki-yay-casserole

The stars at night are big and bright, deep in the heart of Texas...
The Cowboys say "yippee-ki-yay"  deep on the heart of Texas.

Like any fabulous Texas grandma, I have taught parts of this classic price of music to my grands.  Just enough to annoy their parents.  It makes my heart sing when they sing.

So tonight my young adult came home with Texas shaped pasta, so of course we had to eat something Texan. 


The cast of characters
1 pkg Texas pasta
3 bullion cubes (2 chipotle and 1 cilantro)
4 cups water
1 can wolf brand chili without beans
1 cup shredded cheese
Method:
Place pasta and bullion in PC, cover with water.  Low pressure for 4 minutes, quick release.  Add chili and cheese.  Stir.  I enjoyed mine with a dollop of sour cream and we ate it along side blackened salmon.